A long range baby monitor setup fails for boring reasons. The camera is aimed at the ceiling. The parent unit is plugged in across the room, so you have to get out of bed to look at it. The night vision looked fine at 7 p.m. with the hallway light on, and at 3 a.m. with the door shut it looks like gray static.
None of that is a hardware problem. It is a placement problem, and it is the same four or five mistakes in almost every nursery I have walked into.
I am a pediatric nurse and a mom of two kids under five. I have set up a lot of monitors, and I have strong opinions about which parts of the box actually matter. The short version: night vision is the feature, range is what keeps the monitor useful, and the parent unit is the product. A sharp camera feeding a screen that dies at 2 a.m. is not a better monitor than an audio unit that runs all night.
This is the setup order I use, the checks I run before the first night, and the two monitors I would hand a parent right now.
Why you should trust me
Nine years on a pediatric floor taught me that sleep is a medical intervention, not a luxury, and that the parent who is up every 40 minutes checking is not doing anyone any favors. Two kids under five taught me the rest: monitors get knocked off dressers, parent units get chewed, and the feature list on the box has almost nothing to do with how the thing performs on a Tuesday at 3 a.m.
My rules are simple. No opinion without a pitch-dark check. No recommendation without a range test that starts in the nursery and ends in the kitchen. And no monitor that makes you pay a subscription to see your own baby.
I am not going to tell you that a monitor prevents anything. It does not. Safe sleep is about a firm mattress, an empty crib, and a baby on their back. The monitor is for the parent's peace of mind, and it should be judged on whether it actually delivers that.
How I picked and how I tested
The two units below are not the whole market. They are the two I would put in a nursery today, because they clear the bar that matters in a real house.
The bar is four questions. First, can the camera see in a room with zero light, because that is the only condition that matters overnight. Second, does the parent unit last a full night on battery, because a monitor that lives on a charger is a wall phone. Third, what happens when the router hiccups, because it will. Fourth, what does the crib actually look like in the frame: how much of the mattress you can see, and whether the camera holds that view when a toddler stands up.
Field of view is the spec people skip. You want at least 110 degrees for a standard nursery, or you end up seeing a corner of the crib and one ear. Anything less and you are moving the camera every week.
The other thing I check is the mounting situation. A camera balanced on the edge of a dresser is a camera on the floor. If the box includes a mount, that is worth more than an extra megapixel, because it means the camera goes where you can actually see the crib instead of where the furniture happens to be.
Every recommendation in this article is based on the published specifications of each unit matched against those four questions, not on a spec sheet bragging about resolution.
What you need before the first night
You need three things in the room before you plug anything in: a surface or wall position for the camera that is higher than the crib mattress, an outlet that is not behind the crib, and a spot on your side of the bed for the parent unit. That last one is the one people forget, and it is the one that decides whether the monitor gets used.
Here are the two units I would start with.
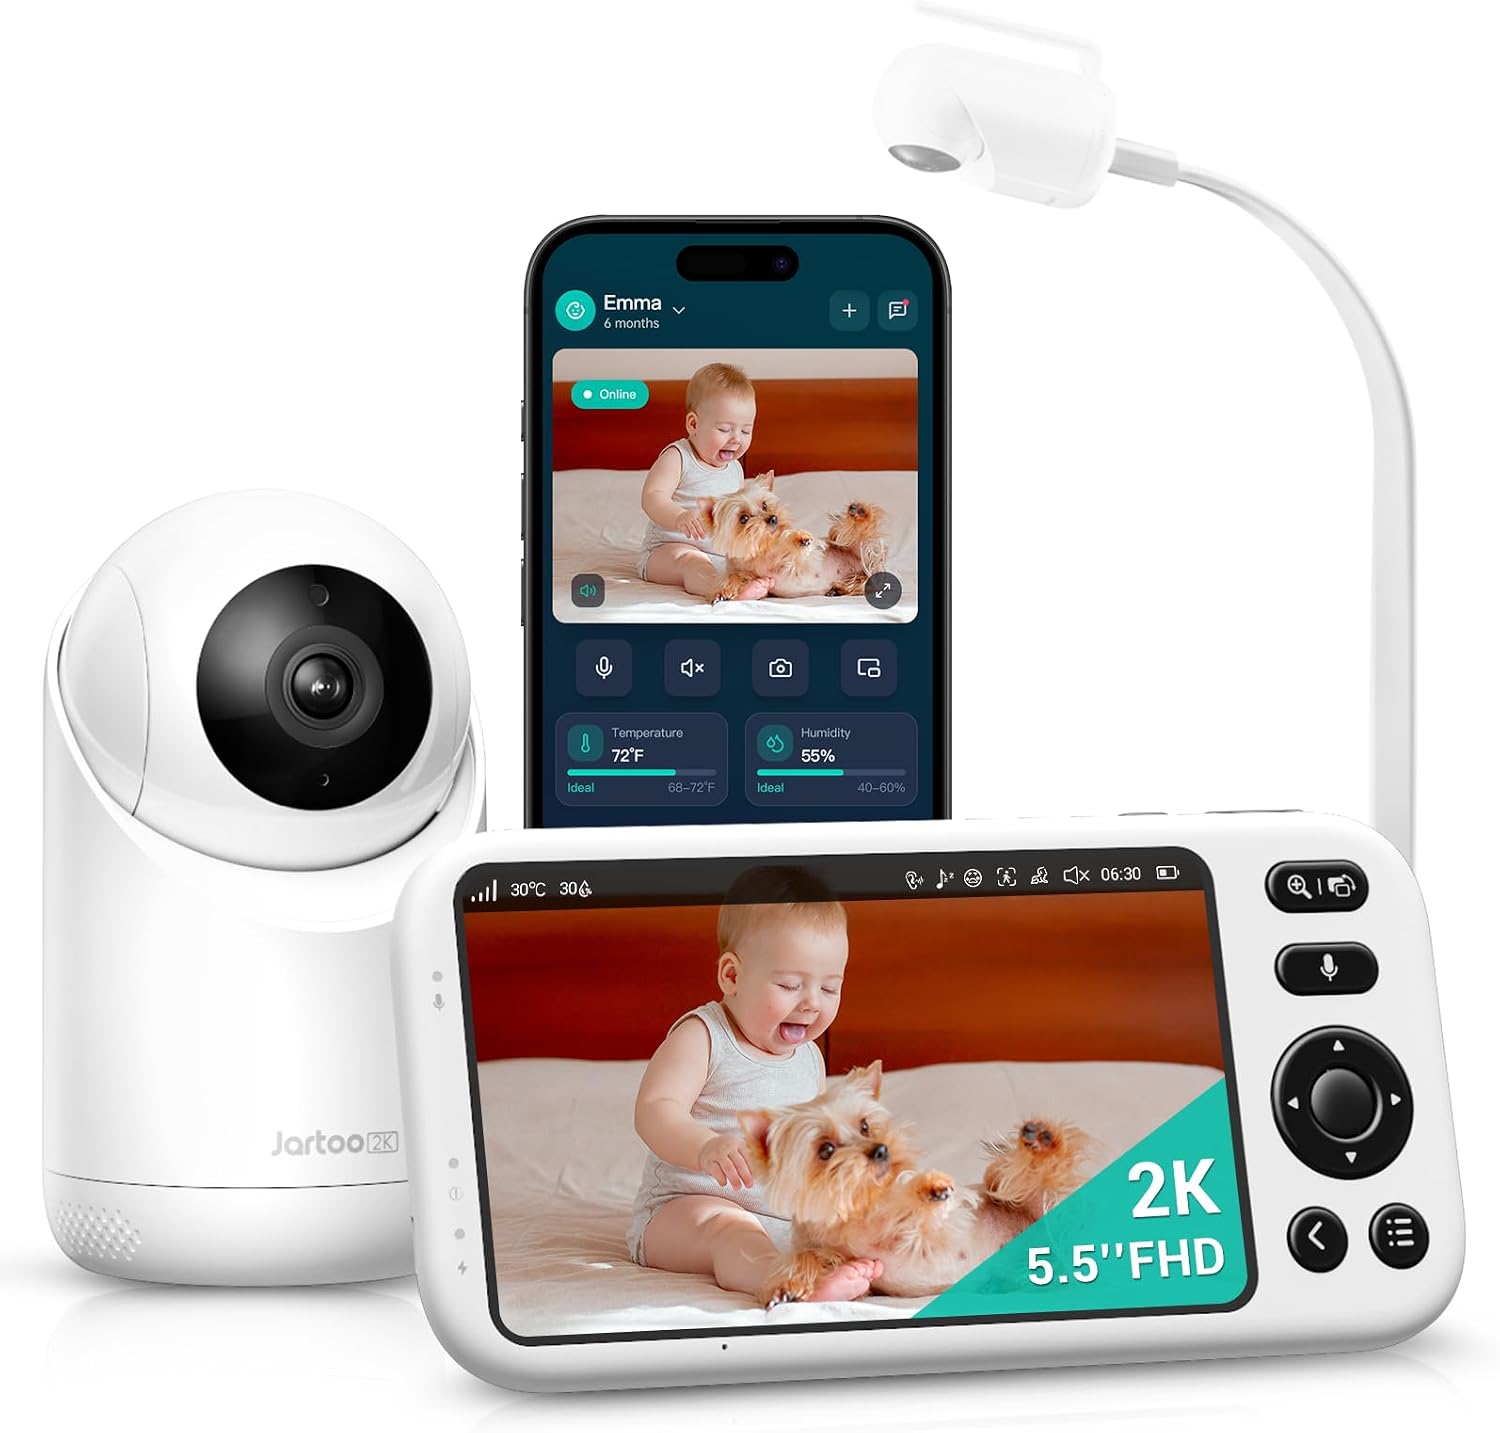
Our pick: Jartoo Smart Baby Monitor with 2K Camera & Mount, 5.5" Screen, Hybrid Wi-Fi and No Wi-Fi Connection, Long Range, AI-Powered Detection, Free App & 24/7 Recording, ANR
 Visit on Amazon →
This is the one I would hand a first-time parent who wants a screen in their hand and an app on their phone. The 5.5 inch parent unit is the part that matters at 3 a.m., because it is the difference between glancing over and getting up. The hybrid connection is the other reason it is here: you get a local link and a Wi-Fi link in the same box, so a router that decides to update itself at midnight does not take the nursery offline. That is the exact scenario that turns a Wi-Fi-only camera into a very expensive night light.
The camera is 2K, which is more resolution than you need to see a baby breathing, and it comes with a mount, which is the spec I actually care about. Mounted high and angled down, a 2K sensor gives you a clean look at the whole mattress instead of a fisheye of the crib rail. The listing also names AI-powered detection, ANR, a free app, and 24/7 recording. The free app matters to me, because subscription fees for basic features are the fastest way for a monitor to end up in a drawer.
Flaws but not dealbreakers: more features means more setup. You are going to spend a real evening on the app, the notifications, and the detection zones before it behaves the way you want. Do that work on a Saturday afternoon, not at 11 p.m. on a Tuesday.
This is the pick for the parent who wants app viewing for naps in the yard and a dedicated screen for overnight. If you want one job done well and nothing else, look at the next one.
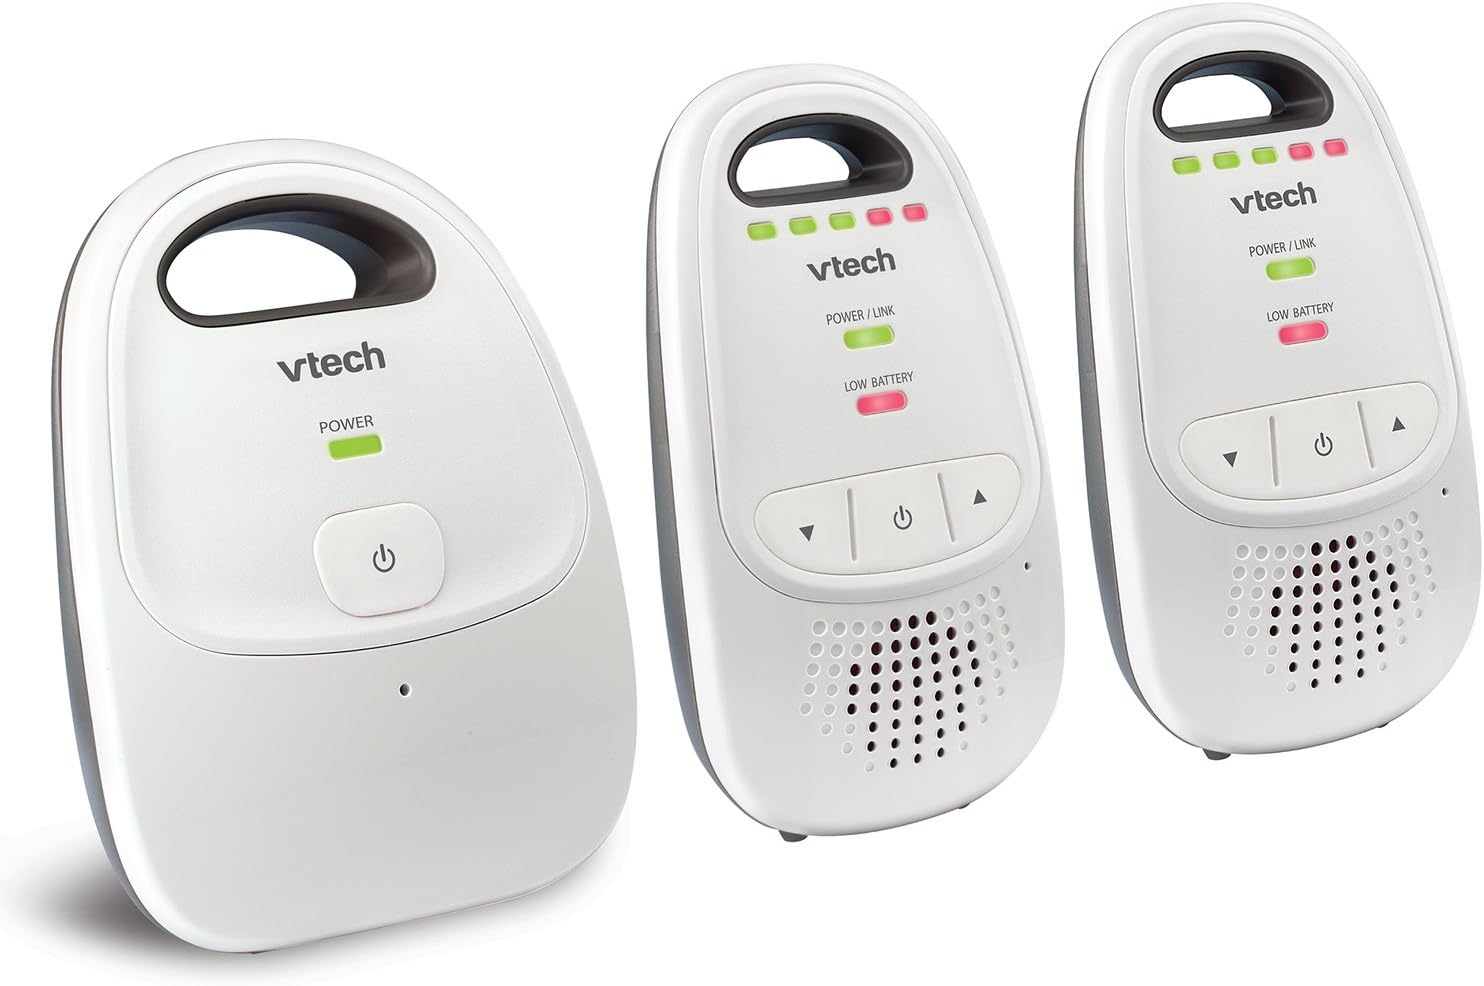
The audio-only pick: VTech Upgraded Baby Monitor with Rechargeable Battery, Long Range, Crystal-Clear Sound, and Alerts
 Visit on Amazon →
The name tells you exactly what this is: rechargeable battery, long range, sound, and alerts. No camera, no screen, no app. For a lot of families that is not a downgrade, it is the point.
Think about what you are actually doing at 3 a.m. You are not studying the crib. You are listening for a specific sound and deciding whether to get up. An audio monitor with a rechargeable parent unit does that job with no night vision to fail, no Wi-Fi to drop, and no screen glowing on your nightstand while you are trying to fall back asleep. The rechargeable battery is the spec that matters most here, because it means the parent unit can live on your side of the bed instead of on the charger in the hallway.
This is the monitor I point parents toward for a toddler's room, where the question is "is she up?" and not "is she breathing?" It is also the right second monitor if you already have a video unit in the nursery and want coverage in a second room without buying another camera.
Flaws but not dealbreakers: audio only means audio only. You will not get a picture, and you will not get a recording of the night. If you are the kind of parent who needs to see the chest rise, this is not the unit for you, and no amount of clear sound will change that.
The setup, step by step
Step one: pick the camera position before you unpack. The camera goes higher than the crib mattress, angled down, with a clear line to the whole mattress. Not behind the crib, not on the crib rail, not on a shelf where the mobile blocks the view. If you can stand at the door and see the mattress, the camera can too.
Step two: deal with the cords. This is the safety step and it is not optional. Keep every cord at least three feet away from the crib, and anchor or hide anything that dangles. A camera sitting on a dresser with a cord hanging in reach is a bigger risk than anything the monitor is going to warn you about.
Step three: secure the mount. If your unit came with a mount, use it. Screw it into a stud or use the wall hardware that came in the box, then confirm the camera does not shift when you bump the wall. A camera that drifts overnight gives you a view of the ceiling by morning.
Step four: frame the crib, then back off. Zoom in so the mattress fills the frame with a little room on each side. If you frame it too tight, you lose the crib edges and you will not see a toddler who has climbed to the corner.
Step five: do the pitch-dark check. Close the door. Turn off the nightlight. Wait five minutes for your eyes and the camera's infrared to adjust. Then look at the parent unit. You should be able to see the shape of the mattress, the sheet, and the baby's outline. If you see gray noise, move the camera closer or angle it away from a reflective surface. Night vision is the feature. If it does not work in the dark, nothing else on the box matters.
Step six: charge the parent unit and run it down. Charge it fully, then leave it unplugged overnight. If it dies before morning, you need to know that on a Saturday, not on the first night you are alone with a newborn.
Step seven: run the range test with the door closed. Walk to the kitchen, the far bathroom, the basement stairs, and the backyard if you have one. Closed doors and brick walls are what kill signal, not distance on the box. Find the dead spots now and decide whether you care. If the signal drops in the kitchen and the kitchen is where you make bottles at 2 a.m., that is a problem worth solving with placement.
Step eight: set the sound sensitivity last. Turn sensitivity down until the monitor only picks up fussing and crying, not the ceiling fan, not the furnace, not the neighbor's dog. Then leave it alone. A monitor that pings all night trains you to ignore it, and an ignored monitor is worse than no monitor.
Step nine: lock down the connection. If you are using a Wi-Fi or hybrid unit, change the default password, turn on two-factor authentication in the app, and keep the firmware updated. A camera in a nursery is a camera in your house, and it deserves the same treatment as your router.
The two checks that decide everything
Night vision and range. Everything else is preference.
Night vision is a pitch-dark test, not a dim-room test. Every camera looks competent with a nightlight on. The infrared mode is what you are paying for, and it either gives you a usable gray-scale image of the mattress or it does not.
Range is a real-house test. The number on the box is measured in open air, which is not a house with plaster walls, a microwave, and a mesh network. Walk the route you actually walk at night with the parent unit in your hand, and judge the monitor on that.
If a unit passes both, you can live with almost anything else about it. If it fails either one, no feature list saves it.
What to skip
Skip anything that requires a subscription to see your own baby. You are renting peace of mind, and the rent goes up.
Skip cry detection as a reason to buy. A monitor that tells you your baby is crying while you can hear them through the wall has added nothing except a notification you will mute in week two.
Skip a second camera before you have tested the first one's night vision. Two cameras that cannot see in the dark are not better than one.
Skip mounting the camera on the crib, on the rail, or anywhere a baby can reach it. That is not a placement choice, it is a hazard.
What this all costs
The cost of a monitor setup is not the monitor. It is the monitor, the mount if one is not included, and whatever subscription the app quietly asks for six months in.
That is why the hybrid pick is worth a look: the mount is in the box and the app is listed as free, so you are not adding a bracket and a monthly fee to a device you already bought. And it is why the audio pick stays in this article at all. If all you need is sound and a parent unit that lasts the night, you can spend the difference on a crib mattress and a blackout curtain, both of which will do more for your baby's sleep than any camera.
The setup itself is free. It costs one evening, one closed-door darkness check, and one walk to the kitchen with the parent unit in your hand.
Do that once, before the first night, and you will not be the parent standing in a dark hallway at 3 a.m. squinting at a screen that shows you the ceiling.