Most registry checklists treat a baby monitor setup as one line item: camera on a shelf, screen on the nightstand, done. Then 3 a.m. happens. The room is black, you are half asleep, and the only question that matters is whether you can see your baby's chest moving on that screen without getting out of bed.
I'm Mei. I'm a pediatric nurse in Columbus, Ohio, and a mom of two kids under five. I have spent more nights watching baby monitors than I have sleeping, and I have learned that almost every monitor that "doesn't work" was never set up to work in the dark in the first place.
A baby monitor setup that holds up overnight comes down to five things: night vision that actually sees in a pitch-dark room, a parent unit that survives until morning, range that reaches the kitchen, a field of view that covers the whole crib, and a camera position that keeps every cord out of your baby's reach. Get those five right and the brand matters far less than the marketing suggests.
Why you should trust me
Nine years as a pediatric nurse, most of them on nights, taught me that sleep is a medical intervention, not a luxury. The NICU nurses who trained me were blunt about it: a rested parent is a safer parent. That is the entire job of a baby monitor.
I follow the AAP safe sleep guidelines the way other people follow sports, which means I care about camera placement and cord management more than I care about resolution specs. I have also listened to hundreds of parents describe, in detail, what their monitor does at 2 a.m. The failures are almost always the same three: it cannot see in the dark, the parent unit dies, or the feed drops when the router hiccups.
That is the lens I use here. Not a feature list, a night shift.
What a working setup has to deliver
Night vision is the feature. If you cannot see your baby at 2 a.m., you are holding a radio, not a monitor. Everything else on the box is secondary to infrared performance in a genuinely dark room.
The parent unit is the product. Camera quality is nice. The handheld screen is what you actually use, and its battery, brightness, and ergonomics decide whether the whole thing is pleasant or infuriating.
Range beats resolution. A sharp feed that drops when you walk into the kitchen is a screensaver with anxiety. Walk the unit around your house before you trust it.
Field of view covers the crib, not the nursery. You want at least 110 degrees so the camera sees all four corners of the mattress, not a decorative wall of decals.
Cords stay out of reach. This one is not negotiable. Keep every cable at least three feet from the crib, per standard safe sleep guidance.
The two monitors I would build this setup around
You do not need two monitors. But the two roles here are genuinely different, and knowing which one you are shopping for solves most of the confusion.
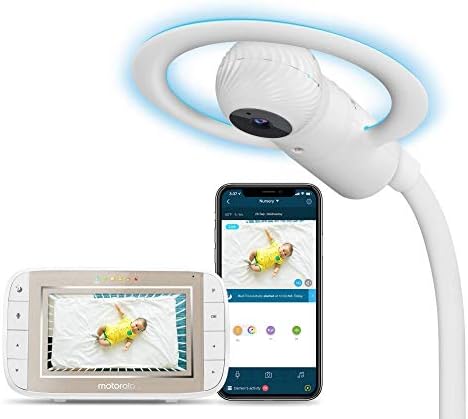
Crib-mount pick: Motorola Halo+ Video Baby Monitor - Infant Wi-Fi Camera with Overhead Crib Mount - 4.3-Inch Color Screen with Infrared Night Vision and Intercom - Compatible with Remote Viewing App and Sleep Tracker
 Visit on Amazon →
The overhead crib mount is the reason this one belongs in the conversation. A camera that looks straight down into the crib answers the only question that matters at 3 a.m., which is whether the chest is moving. A camera across the room at dresser height sees a dark shape under a blanket and calls it a night.
The rest of the package is what you would expect from a Wi-Fi monitor in this class: a 4.3-inch color parent screen, infrared night vision, two-way intercom, and an app for remote viewing plus sleep tracking. The app is genuinely useful when you want to peek from the backyard during a daytime nap. It is also the part that depends on your router, so treat Wi-Fi as a convenience layer, not the foundation.
Flaws but not dealbreakers: Overhead mounting means committing to a fixed position above the crib, so measure before you drill and follow the manufacturer's mounting instructions exactly. And because the video can travel over Wi-Fi, a router reboot at 2 a.m. is a real scenario worth planning for.
This is the pick if you want the clearest possible view of the mattress and you like having the app.
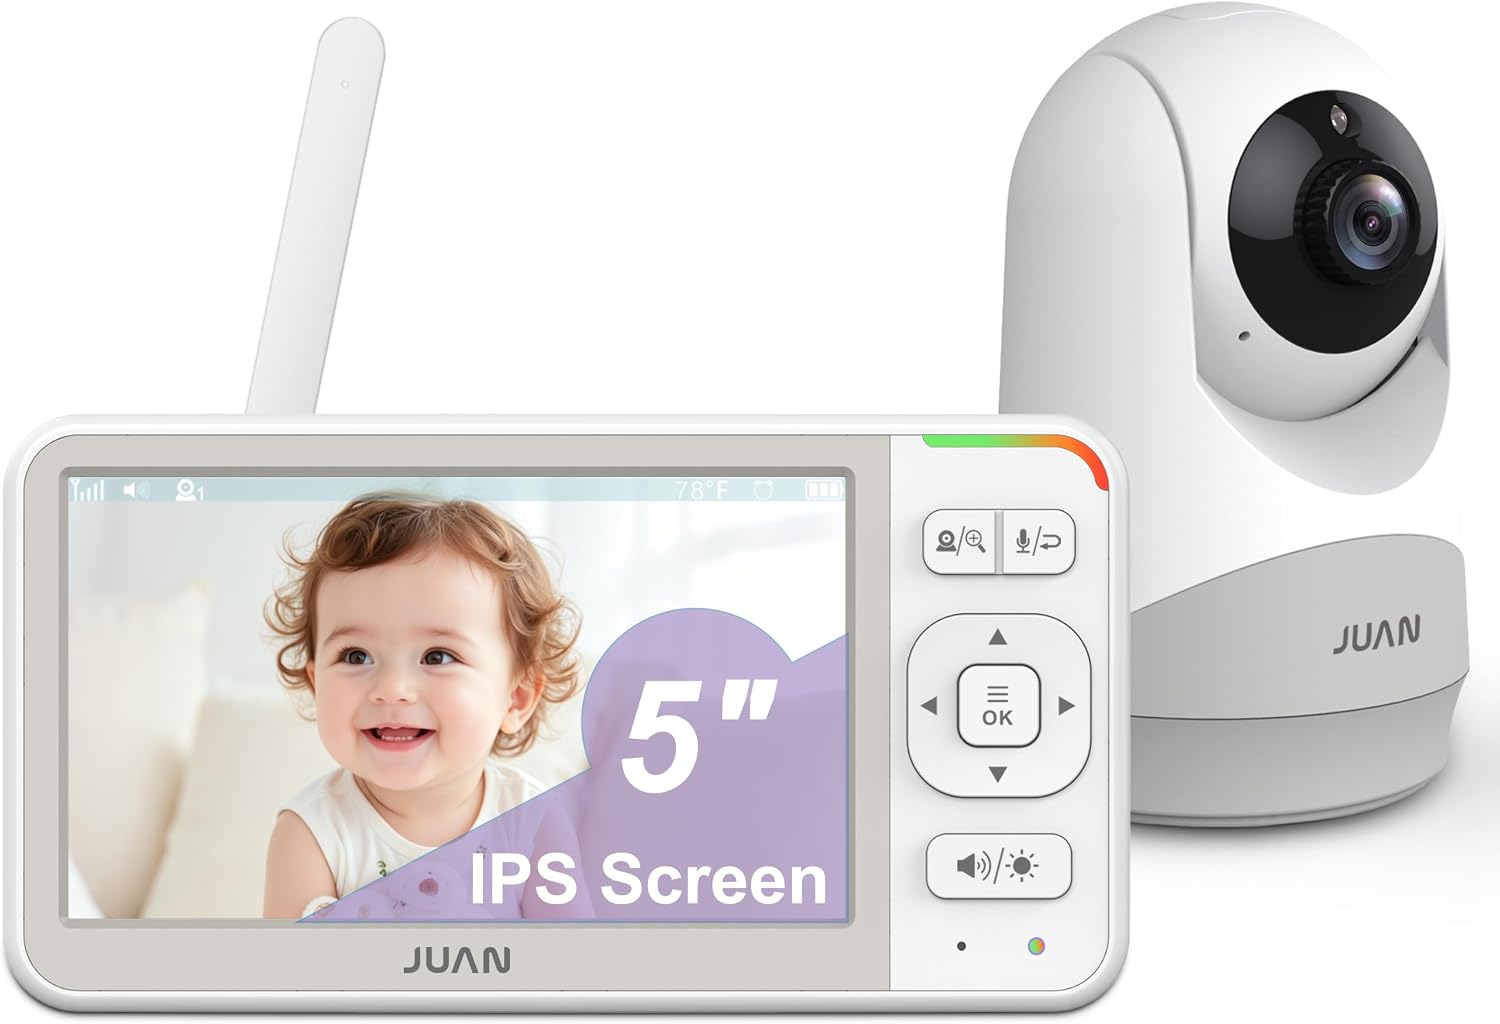
Battery pick: Juan Baby Monitor with Camera and Audio 5" Screen 30-Hour Battery
 Visit on Amazon →
The headline here is in the name: a 5-inch screen and a 30-hour battery. If you have ever watched a parent unit blink out at 4 a.m. mid-feed, you understand why that spec matters more than any camera claim.
A bigger screen sounds like a small thing until you are reading a dark room at 3 a.m. without your glasses. And a battery rated for 30 hours changes your routine: you charge it when you think of it, not because it is about to die on you. Screen brightness is the one setting that eats battery, so dial it down at night and you will get closer to that number.
Flaws but not dealbreakers: A screen-first unit is not the one to buy if remote viewing from your phone is the priority. That is the Motorola's job. This is the one that sits on the nightstand and simply works.
This is the pick if you want a big screen, a battery that lasts the night shift, and fewer things that can go wrong.
The setup, step by step
Step one: Choose the camera position before you buy. Stand in the nursery and find the spot with a clear line to the crib and a short, manageable cable run. Overhead above the crib, or high on the wall facing it. A dresser across the room looks fine in daylight and turns into a shadow puzzle at night.
Step two: Get the camera high and angled down. Height solves two problems at once. It keeps the camera out of reach of a toddler, and it gives you a downward angle that shows the mattress instead of the side rail.
Step three: Frame the crib, not the room. Aim the lens so all four corners of the mattress are visible with a little margin. Then check it from the doorway: if you cannot tell where the baby's head is on the screen, you are too wide.
Step four: Fix the cords. Route every cable behind furniture, secure it with clips, and keep it at least three feet from the crib. Do this before the first night, not after.
Step five: Run a pitch-dark night vision test. This is the step everyone skips. Wait until after sunset, turn off every light, close the curtains or blackout shades, and let your eyes adjust for a full minute. Then look at the screen. Can you see the rise and fall of the chest? Can you tell whether the blanket is over the face? If the answer is no, move the camera or turn off the lamp across the hall. Daytime video tells you nothing about night vision.
Step six: Test range from the kitchen. Walk the parent unit to the kitchen, the laundry room, and the far bathroom, and leave it there for a minute at each stop. Pay attention to where the picture stutters, and note what sits between the camera and the unit. Thick walls and crowded Wi-Fi both cost you range.
Step seven: Build a charging routine. Even a 30-hour battery needs a habit. Put the parent unit on its charger every morning when you make the bed, and keep a spare cable at your bedside for the nights you forget.
Step eight: Plan for a router hiccup. If your monitor routes video through Wi-Fi, know what happens when the router drops: usually a frozen frame or a lost feed, not an alarm. Update the router firmware on a weekend afternoon, not at bedtime, and keep a second, screen-based unit for the nights the network misbehaves.
Step nine: Turn off the gimmicks. Cry detection that cannot tell a cry from a ceiling fan adds noise, not safety. You can hear your baby through the wall. Save notifications for the features you actually need, which are video and audio.
Step ten: Test the whole thing on a normal night. Do a full dry run before you rely on it: one evening of the real routine, lights off, from your own bed. Fix what annoys you then, while you are still awake enough to fix it.
Setup mistakes I see most
- Night vision tested in daylight. The most common one by far. Test in real darkness or you have tested nothing.
- Camera too low and too far. Across-the-room angles hide the mattress and make every shadow look like movement.
- Cords left dangling. Pretty cable runs and safe cable runs are not the same thing.
- Parent unit charged only when it dies. Then it dies at 3 a.m. on the one night you needed it.
- Brightness cranked to maximum. It blinds you at night, wrecks the battery, and makes the dark parts of the image look grainy.
- Trusting the app more than the screen. Apps are great. They are also the piece most likely to be down when you need it.
What this costs
I am not quoting prices, because they move and because your setup cost depends on which role you are filling. Here is the honest breakdown:
- A crib-mount Wi-Fi monitor with an overhead view and app access: Check current Amazon price.
- A screen-and-camera unit with a large parent screen and a long battery rating: Check current Amazon price.
If you are buying one, buy the one that matches your actual habit. If you watch from your phone, the Wi-Fi overhead camera earns its place. If you want a screen on the nightstand and nothing to think about, the battery-first unit is the calmer purchase. And if you already own a monitor that fails the pitch-dark test, spend an evening moving the camera before you spend money on a new one.
The bottom line
A baby monitor setup is not a purchase, it is a test. Camera high, crib fully framed, cords locked down, night vision verified in the dark, parent unit charged and range-checked from the kitchen. Do those five things and you will sleep better, which was the point all along.
That is the job. Set it up once, properly, and let it watch while you rest.